CCD Camera Astrophotography Buyer's Guide: Top Picks Reviewed
Affiliate disclosure: Some links on this page are affiliate links. If you buy through them we earn a small commission at no extra cost to you. This never influences which products we recommend — we only suggest things we'd buy ourselves. Product prices and availability are accurate as of the date published and are subject to change. Always check Amazon for current pricing before purchasing. Learn more.
Quick Picks
SVBONY SV905C Guide Camera, 1.23MP CMOS Sensor, 1.25" USB2.0 Astrophotography Camera with AR-Coated, for Autonomous
1.25 inch form factor fits standard telescope focuser mounts
Buy on AmazonSVBONY SV305C Astrophotography Camera, 2.1MP IMX662 Color Telescope Camera with Removable UV IR Cut Glass, 1.25"
IMX662 sensor provides decent sensitivity for deep-sky astrophotography
Buy on AmazonKodak PIXPRO Astro Zoom AZ528-BK 16 MP Digital Camera with 52x Optical Zoom 24mm Wide Angle Lens 6 fps Burst Shooting
52x optical zoom enables distant celestial object observation
Buy on Amazon| Product | Price Range | Top Strength | Key Weakness | Buy |
|---|---|---|---|---|
| SVBONY SV905C Guide Camera, 1.23MP CMOS Sensor, 1.25" USB2.0 Astrophotography Camera with AR-Coated, for Autonomous best overall | $$ | 1.25 inch form factor fits standard telescope focuser mounts | USB 2.0 connection limits data transfer speed versus USB 3.0 | Buy on Amazon |
| SVBONY SV305C Astrophotography Camera, 2.1MP IMX662 Color Telescope Camera with Removable UV IR Cut Glass, 1.25" also consider | $$ | IMX662 sensor provides decent sensitivity for deep-sky astrophotography | 2.1MP resolution limits detail capture compared to modern astrophotography cameras | Buy on Amazon |
| Kodak PIXPRO Astro Zoom AZ528-BK 16 MP Digital Camera with 52x Optical Zoom 24mm Wide Angle Lens 6 fps Burst Shooting also consider | $$ | 52x optical zoom enables distant celestial object observation | Bridge camera design may lack interchangeable lens flexibility | Buy on Amazon |
Choosing the right camera for astrophotography means understanding a narrower set of trade-offs than most photography decisions. Sensor sensitivity, read noise, cooling, and interface speed matter far more than megapixel count. The astrophotography category rewards careful matching of camera to telescope, mount capability, and imaging goal , a guide camera has different requirements than a deep-sky imager, and a beginner’s first setup has different priorities than a dedicated wide-field rig.
The three cameras reviewed here represent distinct entry points into that spectrum. None of them is a research-grade cooled CCD, but each serves a legitimate function for the amateur working in the mid-range.
What to Look For in a CCD Astrophotography Camera
Sensor Type and Read Noise
The label “CCD camera astrophotography” now covers both true CCD sensors and CMOS sensors marketed for the same use case. The practical distinction has narrowed significantly. Modern CMOS sensors , particularly Sony’s IMX series , deliver read noise below 2 electrons at gain, which matches or beats many legacy CCDs at a fraction of the cost. What matters more than the sensor technology label is the read noise specification at your working gain setting and the full-well capacity, which determines how bright a star can saturate your pixel before blooming occurs.
For visual guiding and short-exposure imaging, read noise matters less because sky background noise dominates. For long-exposure narrowband work, low read noise is critical because you’re stacking many faint frames where each read contributes accumulated noise.
Cooling
Uncooled sensors generate thermal noise that accumulates as dark current over long exposures. At ambient temperatures above 60°F, a 5-minute sub-frame on an uncooled sensor will show significant hot pixel patterns that flat-frame correction alone cannot fully remove. Dedicated astrophotography cameras typically offer thermoelectric cooling to 30, 40°C below ambient, which dramatically reduces dark current.
Entry-level cameras in this category are generally uncooled. That is a legitimate trade-off for visual guiding, planetary work with short exposures, and widefield JPEG-style shooting. For serious deep-sky stacking, the absence of cooling is a meaningful limitation to understand before buying.
Pixel Scale and Field of View
Pixel scale is determined by your sensor’s pixel size and your telescope’s focal length. The calculation is straightforward: pixel scale in arcseconds per pixel equals pixel size in microns divided by focal length in millimeters, multiplied by 206. Getting this wrong , pairing a large-pixel camera with a short focal length, or a tiny-pixel sensor with a long focal length , results in undersampling or oversampling that limits the detail your system can resolve.
Before choosing a camera, know your telescope’s focal length and the typical seeing conditions at your site. Cloudy Nights has extensive threads on matching pixel scale to seeing, and it’s worth reading before committing to a sensor format.
Interface Speed and Compatibility
USB 2.0 is sufficient for guide cameras and for planetary video capture at reduced resolution. For high-resolution all-sky surveys or full-frame deep-sky imaging at high bit depth, USB 3.0 or the newer USB-C implementations matter because frame download time affects duty cycle. A 5-second download on a 30-second sub-frame costs you real imaging time over a session.
Software compatibility is equally important. ASCOM driver support and native integration with Sequence Generator Pro, N.I.N.A., or SharpCap determines how cleanly a camera fits into an existing automation workflow. Check the manufacturer’s driver page before buying , not all budget cameras maintain their drivers across Windows version updates.
Form Factor and Mount Compatibility
The 1.25-inch barrel format is the universal entry point. It threads into any standard focuser drawtube, works with nose-piece adapters for SCT threads, and handles filter drawers. The 2-inch format opens up larger sensor coverage and better vignette control for cameras with physically larger sensors. The full range of astrophotography hardware assumes 1.25-inch as baseline, so cameras in that format have the broadest adapter and filter compatibility.
Top Picks
SVBONY SV905C Guide Camera
The SVBONY SV905C Guide Camera is built for one job: locking onto a guide star and feeding correction data to your mount. It does that job with a 1.23MP CMOS sensor in a 1.25-inch barrel that fits any standard OAG or guide scope without adapter hunting. The AR-coated optical window reduces the reflective losses that would otherwise scatter faint guide star light , at sub-arcsecond guiding targets, every photon counts.
The USB 2.0 interface is not a problem here. Guide cameras don’t need USB 3.0 throughput because they’re transmitting small frames at moderate cadence, not high-resolution raw images. PHD2 and N.I.N.A.’s built-in guider both recognize this camera through ASCOM without driver drama , at least based on reports from similar SVBONY hardware in the guide chain.
The 1.23MP count means the field of view at typical guide scope focal lengths is narrow. That can be a problem if your guide scope points into a sparse star field. In those conditions you may need to offset the guide scope slightly to pick up a usable star. It’s a minor operational note, not a disqualifying flaw , most users running this at f/4 to f/6 on a 50, 60mm guide scope won’t encounter it.
Check current price on Amazon.
SVBONY SV305C Astrophotography Camera
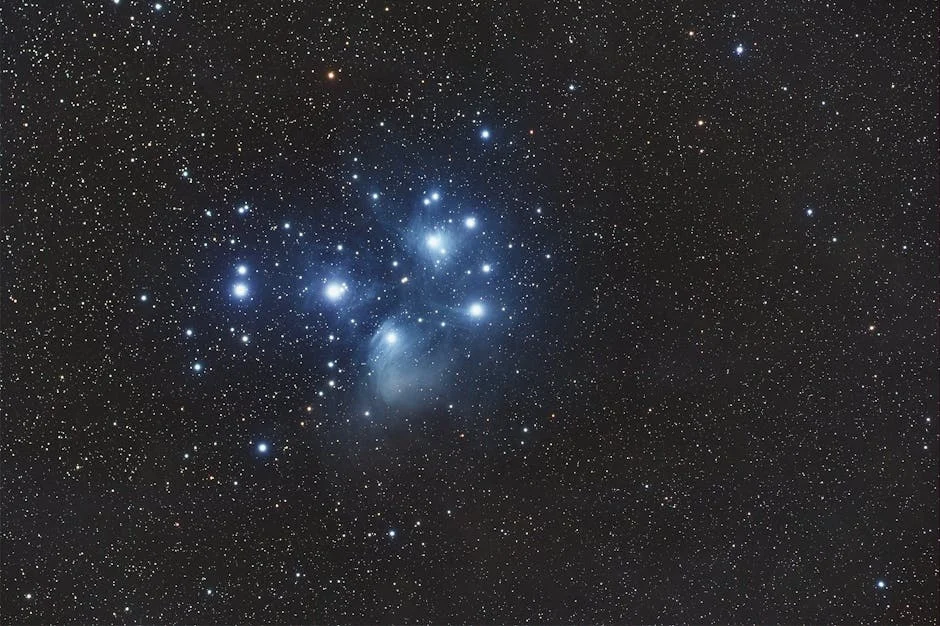
The SVBONY SV305C steps up the ambition slightly. The IMX662 sensor at its core is a Sony unit with reasonable sensitivity in the visible spectrum and passable performance for short-to-medium exposures on bright targets. The 2.1MP resolution is enough to capture the Orion Nebula core, the Pleiades, or the Andromeda galaxy in a way that holds up at modest print size or screen display.
The removable UV/IR cut glass is the most useful feature distinction here. Most deep-sky cameras benefit from having that filter in place for broadband RGB imaging, but if you’re running a hydrogen-alpha filter in front of the camera, you want the UV/IR cut removed , otherwise you’re stacking glass that attenuates the very bandpass you’re targeting. The fact that it’s removable rather than permanently cemented makes this camera more versatile than it looks on paper.
What this camera is not: a cooled, low-noise workhorse for faint nebulae over multi-hour sessions. The absence of thermoelectric cooling means dark current accumulates on long exposures, and 2.1MP limits the detail ceiling. For a beginner learning the imaging workflow on bright showpiece objects before investing in a dedicated cooled camera, it’s a sensible step.
Check current price on Amazon.
Kodak PIXPRO Astro Zoom AZ528
The Kodak PIXPRO Astro Zoom AZ528 occupies a different category entirely. It’s a bridge camera , a self-contained imaging system with a fixed 24, 1248mm equivalent zoom range and a 16MP sensor , rather than a dedicated astronomy camera designed to attach to a telescope. That distinction matters for setting expectations.
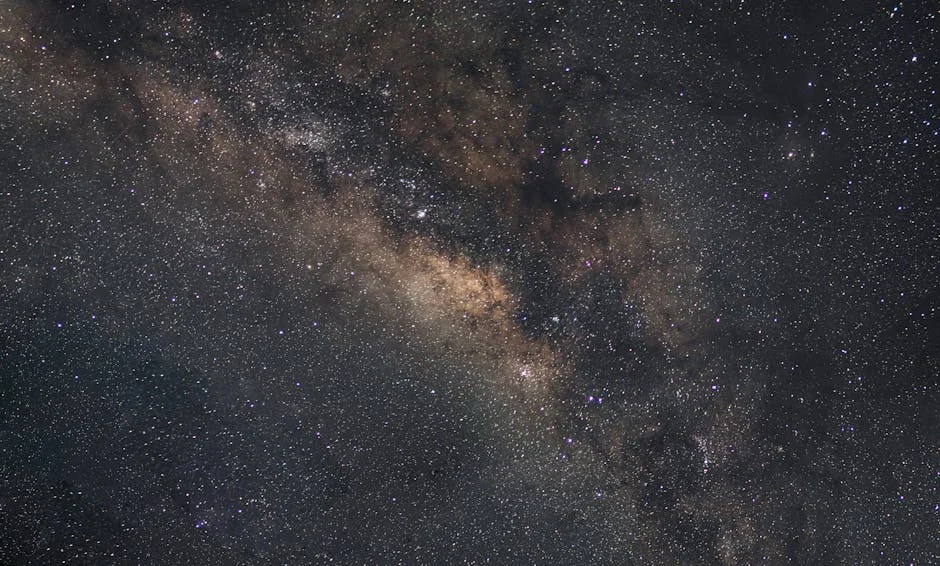
The 52x optical zoom is genuinely useful for lunar observation and for capturing bright planets visually, and the 24mm wide-angle end makes it workable for Milky Way compositions without a telescope at all. The 6 fps burst mode is a reasonable tool for catching ISS transits or meteor events where timing is the constraint. These are real capabilities. the evidence suggests the “Astro Zoom” branding oversells its deep-sky imaging credentials, but for a buyer who wants a single camera that handles daytime, lunar work, and casual nightscapes without managing a telescope interface at all, the use case is coherent.
The fixed lens is the limiting factor for anyone who wants to grow into serious astrophotography. You can’t swap to a fast prime for widefield nebula work. You can’t attach it to a Newtonian without an adapter chain that doesn’t really exist for this form factor. It’s a capable bridge camera with astronomy-friendly zoom range, not a dedicated astrophotography instrument.
Check current price on Amazon.
Buying Guide
Matching Camera to Use Case
The single most clarifying question before buying is: what are you actually trying to image? Guiding, lunar and planetary work, deep-sky broadband imaging, and widefield nightscapes each pull toward different camera specifications. A guide camera optimized for low-latency star detection is a poor choice as a primary imager. A bridge camera with a fixed zoom is a reasonable choice for lunar snapshots and genuinely poor for faint nebula work.
Write down your top three targets for the next six months before evaluating any camera. That list tells you whether you need low read noise for faint extended objects, fast readout for planetary video, or wide field of view for constellation-scale compositions.
Cooling: When It Matters and When It Doesn’t
Thermoelectric cooling matters most for exposures longer than two minutes on faint targets in warm ambient conditions. At high elevations or in cold winter conditions, an uncooled sensor may perform acceptably because ambient temperature suppresses dark current naturally. In New Mexico at 7,000 feet in January, I’ve run uncooled sensors on 3-minute sub-frames with manageable dark noise. In July at sea level, the same sensor in the same exposure time shows a distinctly different noise floor.
If your imaging sessions will run primarily in summer, or if you’re planning H-alpha or OIII narrowband work with long sub-frames, prioritize cooling. If you’re starting with short-exposure lunar and planetary targets, it’s a secondary concern.
Sensor Size and Telescope Pairing
Larger sensors require wider image circles from your telescope’s optical train. Many budget refractors and fast Newtonians only fully illuminate a 1-inch or APS-C image circle , a full-frame sensor in those telescopes will show heavy vignetting in the corners that flat-frame correction can partially but not fully address. Check your telescope’s stated image circle before buying a camera with a large sensor.
For a 1.25-inch format camera on a typical 80mm refractor, this is rarely an issue. The pixel scale calculation (pixel size ÷ focal length × 206) should give you a result between 0.5 and 2.0 arcseconds per pixel for most amateur seeing conditions. Outside that range, you’re either oversampling fine detail that the atmosphere blurs anyway, or undersampling and losing resolution.
Software and Driver Ecosystem
Cameras that lack robust ASCOM or INDI drivers are friction in every session. Before buying, search the Cloudy Nights Equipment forum for your specific model , if threads from the past year show driver crashes on Windows 11 or missing Linux support, that’s a real operational cost. The dedicated astrophotography camera market has fragmented enough that driver quality varies significantly even within a single brand’s product line.
N.I.N.A. and SharpCap both maintain device compatibility lists. If your camera appears on those lists with a green status, you have good evidence of a functional integration. If it appears only as “untested,” budget time for troubleshooting before your first dark-sky session.
Budget Allocation Across the System
A camera is rarely the limiting factor in an entry-level astrophotography system. Mount tracking accuracy, optical quality, and sky darkness typically constrain the final image quality more than the camera’s sensor spec. Spending significantly more on a premium camera while running it on a mount with poor periodic error produces images limited by the mount, not the sensor.
For first-time buyers, a mid-range camera that leaves budget for a better mount, a field flattener, or a narrowband filter will often produce better results than maximizing on camera spec alone. The camera you can actually calibrate, guide, and stack successfully will outperform a camera you can’t integrate into a working system.
Frequently Asked Questions
What is the difference between a guide camera and a primary imaging camera for astrophotography?
A guide camera is optimized for rapid detection of a single star’s centroid position, feeding correction signals to your mount at intervals of one to five seconds. It prioritizes low latency and star detection sensitivity over image quality. A primary imaging camera is optimized for low read noise, dynamic range, and sometimes cooling for long-exposure deep-sky work. You can use a primary imager as a guide camera in a pinch, but a guide camera rarely works well as a primary imager due to limited field coverage and lower dynamic range.
Is USB 2.0 fast enough for astrophotography cameras?
For guide cameras and short-exposure planetary imaging at reduced resolution, USB 2.0 is adequate. The data volume from a 1.23MP guide frame is small, and guide cadence doesn’t demand high throughput. For high-resolution full-frame deep-sky cameras capturing 16-bit raw files, USB 2.0 introduces noticeable download delays that reduce your imaging duty cycle. If you’re running a guide camera like the SVBONY SV905C on a separate port from your primary imager, USB 2.0 on the guide side is not a bottleneck.
Can I use a bridge camera like the Kodak PIXPRO Astro Zoom for deep-sky astrophotography?
You can use it for bright showpiece objects and wide Milky Way compositions, but the fixed lens and uncooled sensor impose meaningful limits on deep-sky performance. The lack of interchangeable lenses means you can’t attach the camera to a telescope’s focuser, and the absence of bulb-mode control via external intervalometer in some bridge camera models limits maximum sub-frame exposure. For casual nightscapes and lunar work, the Kodak PIXPRO Astro Zoom AZ528 is capable. For faint nebulae, a dedicated astronomy camera will produce better results.
Does the SVBONY SV305C work for narrowband astrophotography?
With the UV/IR cut glass removed, the SV305C can be used with narrowband filters such as H-alpha or OIII, which is the most practical path to narrowband imaging at this price point. The IMX662 sensor does have some sensitivity in the H-alpha bandpass at 656nm. The limiting factor is the absence of cooling , narrowband imaging typically requires longer sub-frames to collect sufficient signal, and thermal noise accumulates more aggressively on uncooled sensors. Short narrowband sessions on bright targets like the Orion Nebula are achievable; faint targets in warm conditions are more difficult.
How important is an AR-coated optical window on an astrophotography camera?
The AR coating on the optical window reduces internal reflections that would otherwise scatter light across the sensor, slightly lowering contrast and introducing ghost patterns around bright stars. For guide cameras targeting sub-magnitude guide stars, the sensitivity improvement from reduced reflective loss is genuinely useful. For primary imagers, the coating quality matters more when working with narrowband filters at steep optical cone angles, where uncoated glass can produce interference patterns. It’s a meaningful specification, not marketing language , though the difference in practice is most visible on faint targets and in long-exposure stacks.
Where to Buy
SVBONY SV905C Guide Camera, 1.23MP CMOS Sensor, 1.25" USB2.0 Astrophotography Camera with AR-Coated, for AutonomousSee SVBONY SV905C Guide Camera, 1.23MP CM… on Amazon